
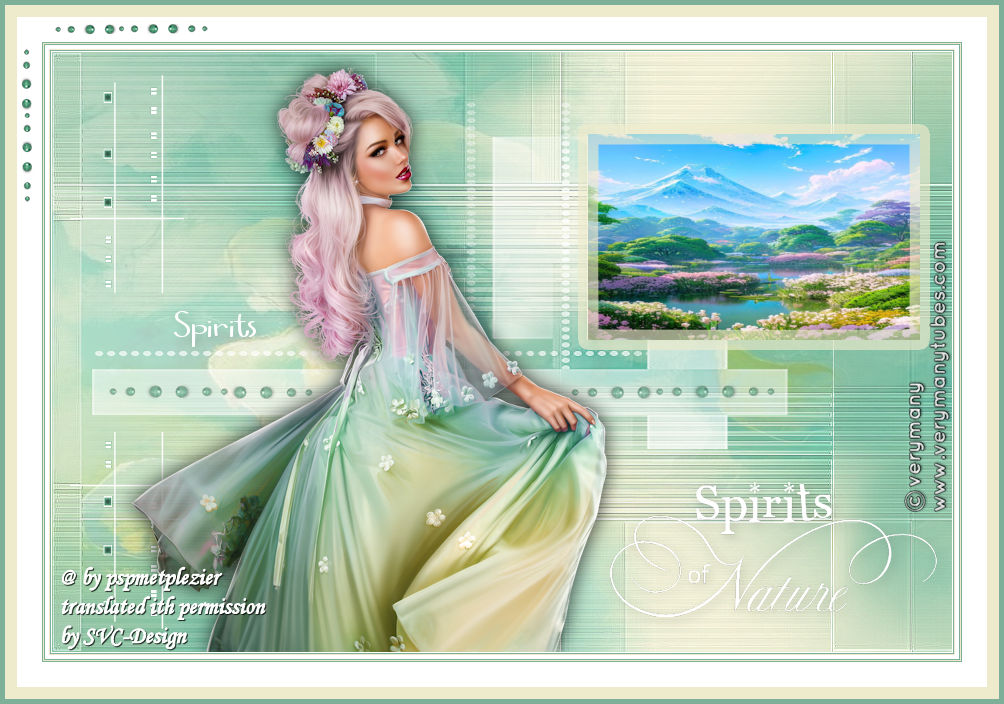
This lesson is made with PSPX9
But is good with other versions.
© by SvC-Design
Materialen Download :
Here
******************************************************************
Materials:
alfa-spirits.pspimage
background-spirits.jpg
deco-spirits-1.png
deco-spirits-2.png
deco-spirits-3.png
deco-spirits-4.png
kleuren-spirits-Ri@.jpg
masker-spirits.png
nature.jpg
tekst-435 - spirits of nature - Ri@.pspimage
tekst-spirits-Ri@.png
******************************************************************
Plugin:
Effects – plugin - Medhi - Wavy Lab 1.1
Effects - Plug-in filters - Mehdi - Melt.
Effects - Plugins - Unlimited - &<Bkg Designer sf101> - CirclePede
******************************************************************
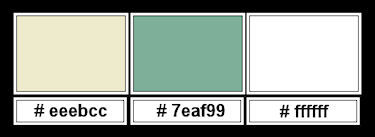
color palette
:
******************************************************************
methode
When using other tubes and colors, the mixing mode and / or layer coverage may differ
******************************************************************
General Preparations:
First install your filters for your PSP!
Masks: Save to your mask folder in PSP, unless noted otherwise
Texture & Pattern: Save to your Texture Folder in PSP
Selections: Save to your folder Selections in PSP
Open your tubes in PSP
******************************************************************
We will start - Have fun!
Remember to save your work on a regular basis
******************************************************************
1.
Foreground color # eeebcc
Background color # 7eaf99
Extra color ffffff
2.
Open the alpha sheet in PSP.
Window - duplicate.
Close the original.
We are working on the duplicate
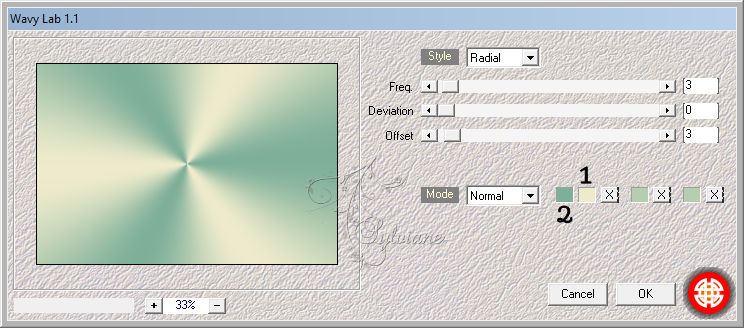
Effects – plugin - Medhi - Wavy Lab 1.1
3.
Adjust - blur - gaussian blur - range 7.
Layers - duplicate.
Effects - Plug-in filters - Mehdi - Melt.
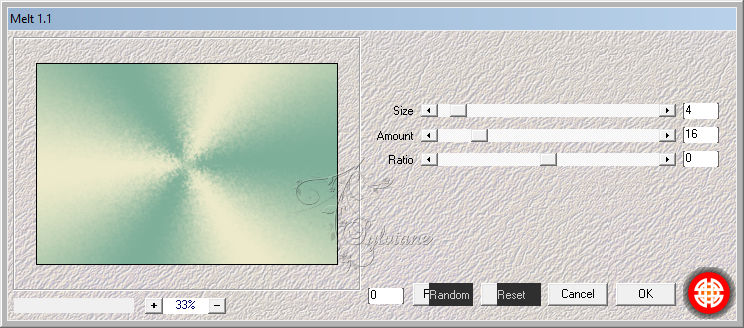
4.
Effects - Plugins - Unlimited - &<Bkg Designer sf101> - CirclePede.

Blend mode - soft light.
Adjust - blur - gaussian blur - range 7.
Layers - merge - merge visible layers.
5.
Selections - select all.
Layers - new raster layer.
Open background-spirits.jpg
Edit - copy.
Back to your image.
Edit - paste into selection.
Selection - Select None
opacity :30.
Layers - merge - merge down.
6.
Open the tube mask-spirits.
Edit - copy.
Back to your image.
Edit - paste as a new layer.
Looks good right away.
7.
Open the tube deco-spirits-1.
Edit - copy.
Back to your image.
Edit - paste as a new layer.
Looks good right away.
Effects - Plugins - Xero - Clarity - Standard.
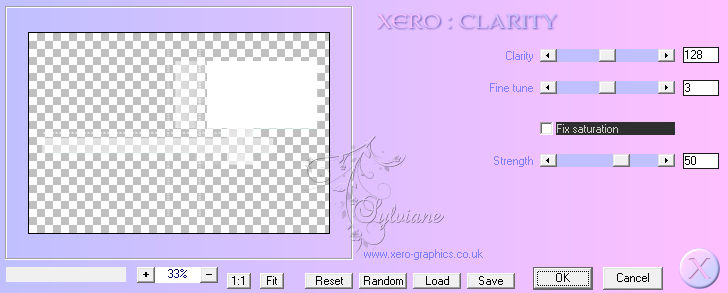
8.
Layers - New raster layer.
Selections - load/save - Load selection from alpha channel - open selection 1.
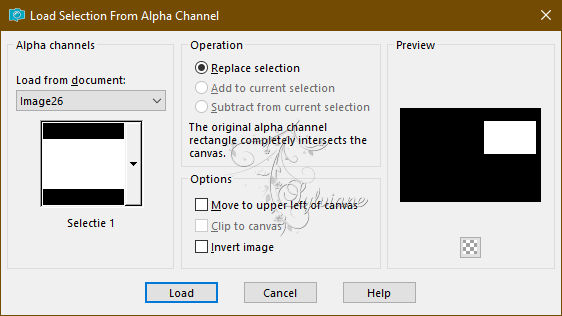
Open nature.jpg
Edit - copy.
Back to your image.
Edit - paste into selection.
Selections - modify - select selection borders
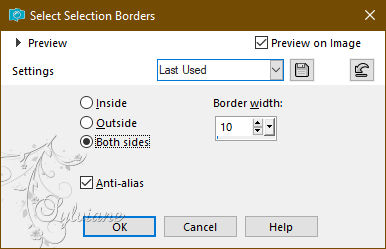
9.
Layers - new raster layer.
Flood fill the selection with the foreground colour.
Selection - Select None
Layer opacity 65.
10.
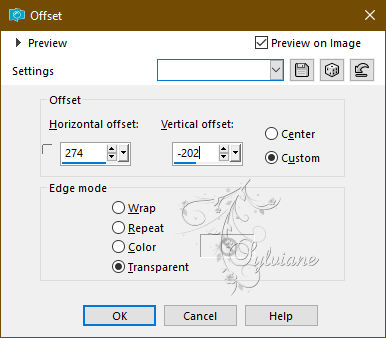
Open the tube text-435 - spirits of nature - Ri@.
Edit - copy.
Back to your image.
Edit - paste as a new layer.
Effects - image effects - offset.
11.
Open the tube deco-spirits-2.
Edit - copy.
Back to your image.
Edit - paste as a new layer.
Effects - image effects - offset.

Layer opacity 75.
12.
Open the tube text-spirits-Ri@.
Edit - copy.
Back to your image.
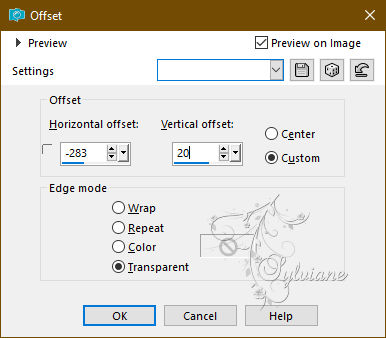
Edit - paste as a new layer.
Effects - image effects - offset.
13.
Open the tube deco-spirits-3.
Edit - copy.
Back to your image.
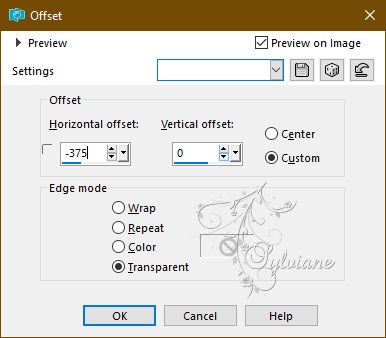
Edit - paste as a new layer.
Effects - image effects - offset.
14.
Open and paste your chosen tube.
Give it a nice drop shadow.
Layers - merge - merge all layers.
15.
Image - Add Borders – Symmetric -1 pixel - colour white.
Image - Add Borders – Symmetric -1 pixel - background colour.
Image - Add Borders – Symmetric -1 pixel - foreground colour.
Image - Add Borders – Symmetric -4 pixel - colour white.
Image - Add Borders – Symmetric -1 pixel - background colour.
Image - Add Borders – Symmetric -1 pixel - foreground colour.
Image - Add Borders – Symmetric - 1 pixel - background colour.
Image - Add Borders – Symmetric -25 pixels - colour white.
Image - Add Borders – Symmetric - 12 pixels - foreground colour.
Image - Add Borders – Symmetric - 5 pixels - background colour.
16.
Open the tube deco-spirits-4.
Edit - copy.
Back to your image.
Edit - paste as a new layer.
Place the tube in the top left corner on the white border.
17.
Place your name or watermark.
Layers - merge - merge all layers.
Image - resize - 900 pixels - longest sides.
Save as JPEG
Back
Copyright Translation 2024 by SvC-Design
------------------------------------------------------------------------------
Thanks to all who created